Tech tip: Imaging bacteria using the agarose pad technique
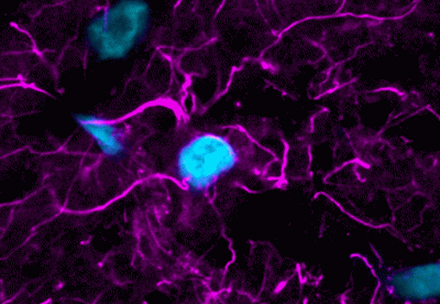
Bacteria can be more difficult to image than other cell types because they are small, usually non-adherent, and are often motile. Motile live bacteria are more difficult to image than dead or fixed bacteria, but even fixed bacteria move a lot due to Brownian motion. It can feel next to impossible to perform multi-color fluorescence imaging, since even a small movement between two channel acquisitions prevents a nice overlay (Figure 1). One simple way to try to immobilize cells is to plate them on poly-L-lysine (PLL). However, we have found PLL to be insufficient to immobilize bacteria, particularly motile live bacteria. In the method presented here, we describe how to image live or fixed bacteria using agarose pads to immobilize the cells during the imaging process, allowing you to perform multi-color fluorescence microscopy experiments.
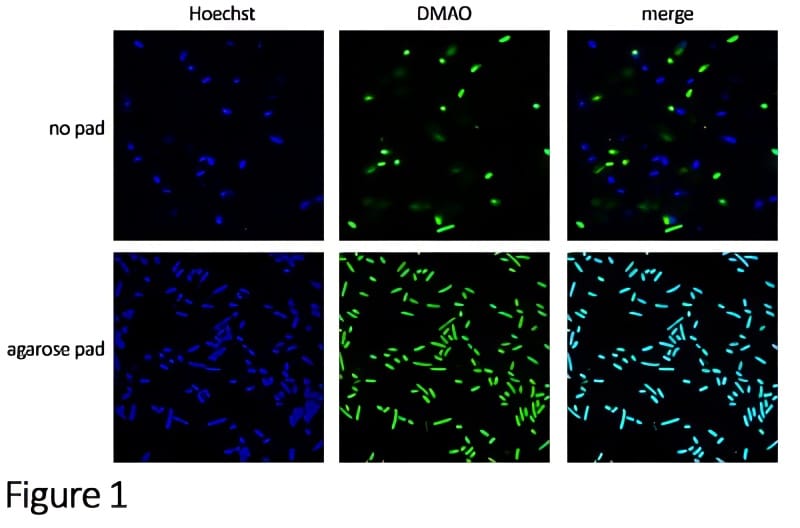
E. coli were stained in suspension with 100 µM DMAO (green) and 100 µg/mL Hoechst (blue). Some cells were pipetted into a 96-well tissue culture-treated optical-bottom plate (top row), while others were mounted on agarose pads according to the protocol described here (bottom row). Sequential images were taken on a confocal microscope in the DAPI and FITC channels. The bacteria on the agarose pads were immobilized, allowing good overlap of the two signals.
Materials required
Low-melt agarose, glass slides (can be reused each time), 24mm x 50mm coverslips, 18mm x 18mm coverslips, scalpel or razor blade
Protocol for preparing agarose pads
Make a 1% low-melt agarose solution in water, about 10 to 15 mL. Microwave it in a glass flask or bottle for about 30 seconds, swirling occasionally, until the agarose is completely dissolved. Wait for about 5-10 minutes before proceeding, so that the molten agarose is viscous enough to stay within the well you will create in the next step. If it is too runny it may leak out of the set-up.
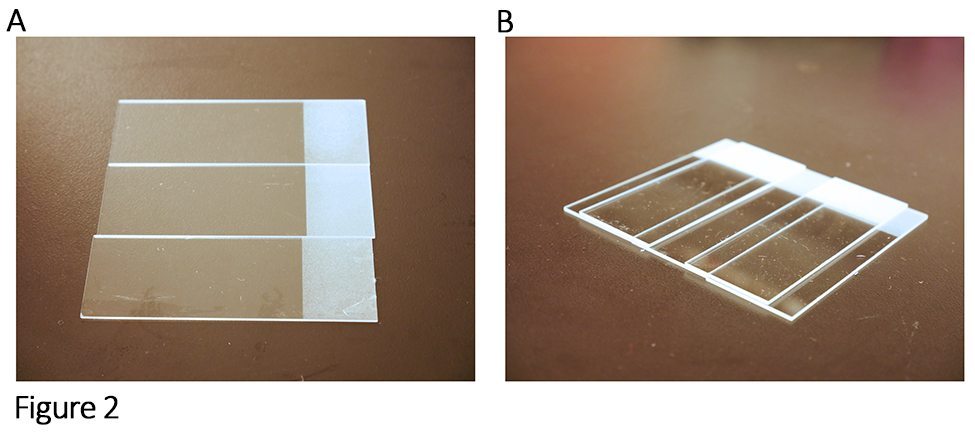
Arrange three glass slides side by side, with their edges touching, as shown in Figure 2A. Place two more glass slides on top of the first three, in a staggered configuration (Figure 2B).
Setting up the agarose pad chamber.
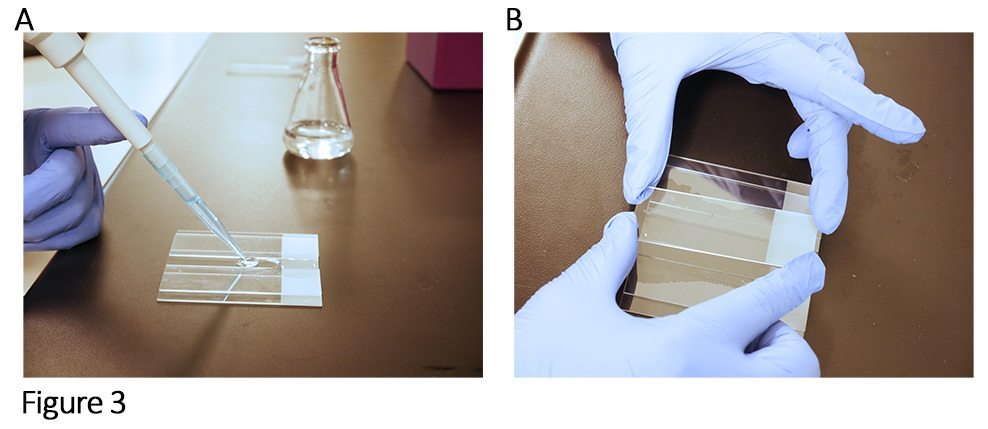
Pipette about 1 mL of the molten agarose into the center well between the two upper glass slides (Figure 3A), making sure that there is enough agarose to fill the well to the top, then place another slide on top of the molten agarose (Figure 3B). Try to avoid the formation of air bubbles during this process.
Adding the agarose to the well.
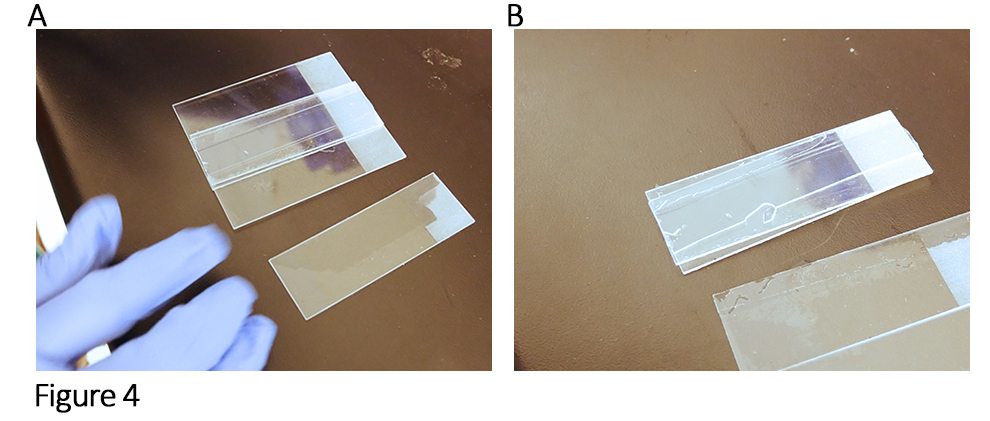
Wait 45 minutes for the agarose to become firm enough to handle (more than an hour and it may become too dry to withstand the heat from the microscope and break). Remove the two outer glass slides first (Figure 4A), and then the next two side slides, leaving just the two slides that are sandwiching the agarose (Figure 4B).
Taking apart the chamber after the agarose has solidified.
Slowly slide the glass slides apart, being careful that the agarose pad doesnt slip off or tear. It should remain on one of the slides.
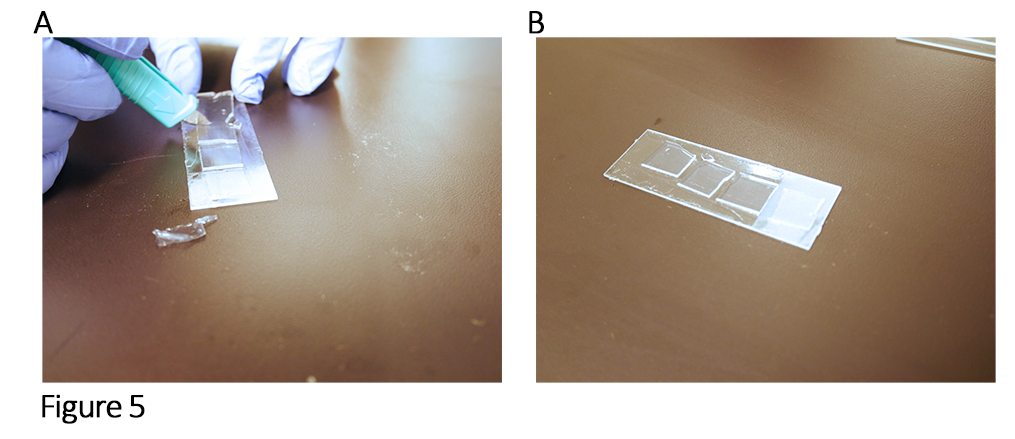
Using a scalpel or razor blade, gently cut the pad into small squares, ~ 1 x 1 cm (Figure 5).
Cutting the agarose into multiple square pads.
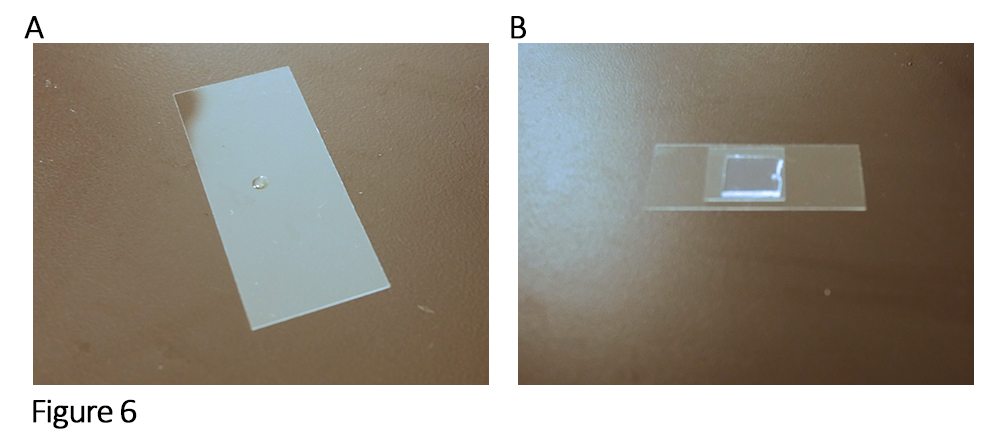
Put down a long coverslip (~24mm x 50mm) and pipet 2 uL of bacterial culture onto it (Figure 6A).
Carefully lift one square of agarose pad off the slide with your fingers or with the flat surface of the blade and place it on top of the bacteria.
Place a small (18mm x 18mm) coverslip over the agarose pad (Figure 6B).
Preparing the imaging chamber with coverslips, agarose pad and bacterial culture.
Image your bacteria on an inverted fluorescence microscope with a 40X or higher power oil objective, imaging through the long coverslip with the agar pad on top. During imaging, there might be areas near the edge of the agarose pad where the bacteria will be moving. They are more likely to be static towards the center of the pad.
Note: This coverslip/agarose pad set-up is optimized for use with an inverted microscope, with the objective below the sample. If you are using a microscope with the objective above the sample, you may want to prepare the set-up as follows, from bottom to top: glass slide, agarose pad, 2 uL bacteria culture, coverslip.
References:
Measuring mRNA copy number in individual Escherichia coli cells using single-molecule fluorescent in situ hybridization. Skinner et al. 2013. Nature Protocols.
 New Products
 Earth-Friendly Products
 Biotium Choice Antibodies
 Special Offers